
Sprouted Chia Seeds vs. Soaked Gel: The Terracotta Sprouting Method, Enzymatic Activation & Mineral Yield
A botanical agronomic guide to Salvia hispanica germination: why hydrophilic mucilage ruins mason jar sprouting, the biophysics of terracotta capillary hydration, and how 8 days of photosynthetic growth liberates vitamin C and deactivates phytic acid.
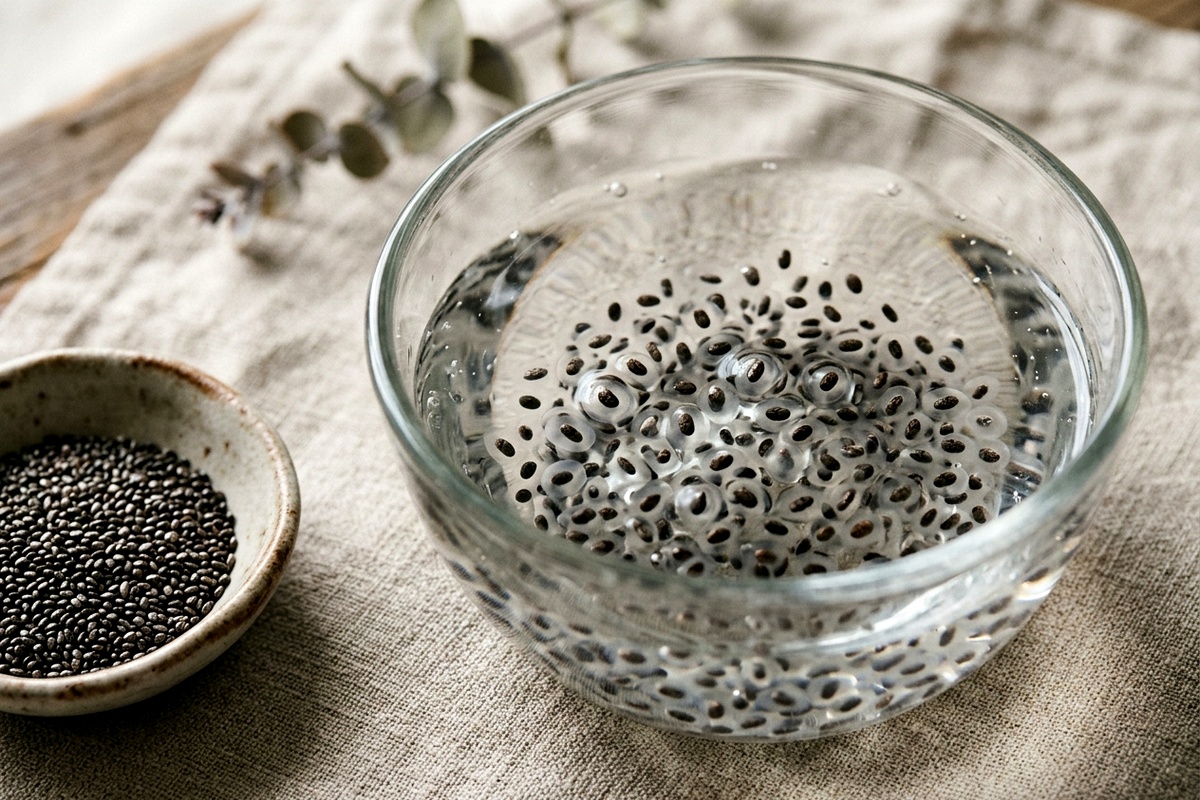
Chia seeds (Salvia hispanica) are celebrated globally as functional super-seeds, famous for their high concentration of alpha-linolenic acid (ALA Omega-3), soluble dietary fiber, and plant-based protein. For most health enthusiasts, eating chia means stirring dry seeds into milk or water to form a thick, gelatinous pudding.
Can you sprout chia seeds? Yes, but never in a standard mason jar. Chia’s thick polysaccharide mucilage suffocates seeds in jars, causing rot within 48 hours. Instead, use an unglazed terracotta saucer: the porous clay wicks moisture via capillary action, allowing seeds to breathe while sprouting into succulent emerald microgreens in 7–9 days, cutting phytic acid by 80% and generating fresh vitamin C.
However, when inquisitive home growers attempt to sprout chia seeds using standard mesh-screen mason jars—the traditional tool for alfalfa, lentils, and radishes—the result is almost always a disappointing, foul-smelling failure. Within two days, the seeds fuse into an impenetrable slime ball that suffocates the embryonic shoots and breeds fungal mold.
To successfully sprout Salvia hispanica and unlock its living enzymatic bounty, you must abandon jars and harness the ancient physics of porous terracotta clay.
Above-the-Fold Form & Bioavailability Matrix
Compare how sprouted terracotta chia microgreens perform against overnight soaked chia gel, dry milled chia, and conventional jar sprouting attempts:
| Form & Preparation Method | Sprouting Feasibility | Phytic Acid Level | Active Vitamin C & Chlorophyll | Primary Bioactive Benefit |
|---|---|---|---|---|
| Mason Jar Sprouting Attempt | Fails (Mucilage suffocates embryo) | High (Rot occurs before cleavage) | Zero (Decays in darkness) | Unviable / Mold Hazard |
| Overnight Soaked Gel (Pudding) | N/A (Hydrated dormant seed) | Moderate (Phytic acid remains largely intact) | Zero native vitamin C | Maximum Prebiotic Soluble Mucilage |
| Cold-Milled Raw Chia Flour | N/A (Mechanically fractured) | Moderate | Zero | Fast Omega-3 Lipid Bioaccessibility |
| Terracotta-Sprouted Microgreens | 100% Success (Capillary oxygenation) | Lowest (80%+ Phytate reduction) | Abundant (Living cotyledons) | Living Enzymes & Mineral Bioavailability |
1. The Biophysics of Mucilage: Why Jars Fail
The fundamental challenge in sprouting chia seeds lies in the outermost layer of the seed coat (testa). The epidermis of Salvia hispanica contains specialized cells called myxocytes.
When dry chia seeds contact moisture, these myxocyte cells instantaneously burst, exuding a dense, high-molecular-weight hydrophilic polysaccharide matrix comprised primarily of: - D-xylose - D-glucose - 4-O-methyl-α-D-glucuronic acid
   [ Dry Chia Seed ] ──(Contact with Water)──> [ Myxocytes Swell 12x ]
                                                       │
                                                       ▼
                                         [ Dense Hydrocolloid Gel Envelope ]
                                                       │
                   ┌───────────────────────────────────┴───────────────────────────────────┐
                   ▼ (Inside a Mason Jar)                                                  ▼ (On Porous Terracotta)
     [ Seeds Clump Into Anaerobic Ball ]                                    [ Capillary Action Wicks Perfect Water ]
     [ Oxygen Depleted -> Fermentation ]                                    [ 360° Air Circulation & Evaporation ]
                   │                                                                       │
                   ▼                                                                       ▼
      [ Fungal Rot Within 48 Hours ]                                           [ Rapid Radical Germination ]
In a traditional sprouting jar, this gel acts like plastic wrap. It binds thousands of seeds together into an airtight mass. Because the seeds cannot access atmospheric oxygen, cellular respiration halts, and anaerobic bacteria and mold proliferate rapidly.
To understand why this mucilaginous gel behaves this way in human digestion, review our clinical analysis of why you should never eat chia seeds dry and compare it against basil seeds vs chia seeds.
2. The Terracotta Solution: Capillary Micro-Hydration
The solution to sprouting mucilaginous seeds was mastered by ancient Mesoamerican and Mediterranean civilizations: porous, unglazed red terracotta clay.
Unglazed terracotta possesses an intricate network of microscopic ceramic pores that act as a natural capillary pump: 1. Continuous Moisture Delivery: Water stored inside or beneath the terracotta plate migrates through the ceramic matrix at the exact rate needed to keep the seeds hydrated, without pooling standing water. 2. 360-Degree Aerobic Ventilation: Because the seeds rest on an open ceramic plane rather than being submerged inside a glass jar, the surrounding air constantly supplies oxygen to the germinating embryonic tissue. 3. Natural Seed Anchorage: The slightly rough, porous texture of unglazed clay gives the tiny emergent root radicles a sturdy tactile surface to anchor into, forcing the green shoots upward toward the light.
3. The Biochemical Transformation: Soaked Gel vs. Living Microgreens
Why bother sprouting chia seeds when overnight chia pudding is already so healthy? The nutritional difference is staggering:
1. Phytic Acid Degradation & Mineral Liberation
Dormant chia seeds store phosphorus as inositol hexaphosphate (phytic acid), which chelates calcium, magnesium, and zinc into insoluble complexes. When germination is triggered on terracotta, endogenous phytase enzymes awaken, cleaving up to 82% of phytic acid bonds within 7 days. This transforms chia from a moderate mineral source into an intensely bioavailable mineral generator.
2. De Novo Synthesis of Vitamin C and Chlorophyll
Dormant chia seeds contain virtually 0 mg of vitamin C and zero chlorophyll. By day 8 of terracotta sprouting, photosynthetic chloroplasts in the cotyledon leaves synthesize active ascorbic acid (vitamin C), beta-carotene, and vibrant chlorophyll a and b, introducing bioactive phytonutrients impossible to obtain from soaked chia pudding.
3. Protein Cleavage into Free Peptides
During germination, seed storage globulins (11S and 7S globulins) are enzymatically broken down by seed proteases into easily absorbed free amino acids and low-molecular-weight peptides, eliminating any potential digestive sluggishness.
Learn more about the enzyme activation kinetics of seeds in our countertop sprouting protocol for bioactive nutrients.
4. The 8-Day Terracotta Sprouting Protocol
Follow this simple, elegant kitchen methodology to grow crisp, peppery chia microgreens at home:
- Step 1: The Terracotta Prep (Day 0): Purchase an inexpensive 6-inch to 8-inch unglazed terracotta saucer (the drip tray used under clay flowerpots). Submerge the entire saucer in clean water for 1 hour to saturate its ceramic pores.
- Step 2: Seed Inoculation & Painting: Measure 1 tablespoon of raw organic chia seeds. Add 3 tablespoons of filtered water and stir. Let sit for 10 minutes until a spreadable, cohesive gel forms. Using the back of a spoon or clean fingers, spread the gelatinous seeds across the wet terracotta saucer in a single, even layer. Do not let the seeds clump into thick stacks.
- Step 3: The Moisture & Canopy Phase (Days 1 to 3): Place the seeded saucer inside a shallow tray of water (1/4 inch deep) so the base continues drawing water via capillary action. Cover the saucer loosely with an inverted ceramic bowl or damp towel to maintain high humidity. Keep at room temperature away from direct sun.
- Step 4: Sunlight & Chlorophyll Synthesis (Days 4 to 8): By day 3 or 4, thousands of delicate white root hairs will anchor into the terracotta. Uncover the saucer and move it to a bright windowsill or under an LED grow light. Mist the greens lightly with a spray bottle once daily. Within 48 hours, the pale shoots will turn a radiant emerald green.
- Step 5: The Snipped Harvest (Days 8 to 10): When the cotyledon leaves are broad and approximately 1.5 to 2 inches tall, snip the succulent shoots cleanly above the terracotta base using kitchen shears. Rinse gently and enjoy immediately.
5. Elevate Your Weekly Botanical Diversity
Harvesting your own freshly sprouted chia microgreens adds living cotyledon bioactives to your meals that elevate gut microbiome richness.
Log your sprouted chia microgreens in our 30-Plants Microbiome Diversity Tracker, calculate real-time nutritional yields with our Daily Seed Nutrition & Protein Stacker, and discover the 25% complete protein density of larger greens in our guide to sunflower microgreens vs sprouts.
Frequently Asked Questions About Sprouted Chia Seeds
Yes, you can sprout chia seeds at home, but not in traditional mason sprouting jars. Because chia seeds exude a thick polysaccharide mucilage when wet, jar rinsing creates a suffocating gelatinous mass that quickly rots. Chia seeds must be germinated on porous, unglazed terracotta clay saucers, a moist linen cloth, or shallow potting soil where they receive capillary hydration with constant airflow.
Yes. While soaked chia seeds provide excellent soluble prebiotic fiber and hydration, sprouting chia seeds triggers profound biochemical upgrades: phytic acid drops by over 80% to dramatically increase zinc, iron, and calcium bioaccessibility, while active chlorophyll, carotenoids, and vitamin C (which are non-existent in dormant dry chia) are freshly synthesized.
Chia seeds begin germinating tiny white root radicles within 48 to 72 hours on a moist terracotta surface. By days 7 to 9 under ambient natural sunlight, they develop succulent, emerald-green cotyledon microgreen leaves that are ready to harvest with kitchen shears.
Sprouted chia microgreens have a delicate, fresh, and slightly tangy flavor with a crisp watery crunch, reminiscent of mild watercress or butterhead lettuce. Unlike raw soaked chia gel, they have zero gelatinous texture and make an exquisite fresh garnish for avocado toast, grain bowls, and smoothies.